Showing posts with label bike maintenance. Show all posts

Friday, March 28, 2025

Torque is Cheap

Torque is easy on a BMX. Get the right tool, tighten the bolt as much as you comfortably can and go ride. This doesn't seem to work so well on an MTB. More of an emphasis on weight saving means it's much easier to damage things by overtightening them, and I've found that neither of my dropper posts works smoothly if the seat clamp is done up too tight. I caved in early on in my MTB renaissance and bought a cheap torque wrench that is supposed to be good for 2 - 12 Nm, but I have had some trouble with loosening and over-tightened cassettes. When it came to swapping in a new wheel recently I decided to have a go at getting the correct torque for cassettes and brake rotors without buying a second wrench for the higher torque required. Here's what I came up with.
Hands equidistant from the hub, tool parallel to the floor for best results!


In case you need to do the same, here's how it works. The required torque is 40Nm, i.e. a force of 40N applied at a (perpendicular) distance of 1m from the pivot point (hub). My tool is 20cm, or one fifth of a metre, long, so I need to apply five times that force to the end of it: 200N. Since I also need to push down the same amount with the other hand to stop the wheel rotating, the total force I'm pushing down with needs to be 400N. Assuming you have scales calibrated for use on the earth's surface divide that by 10 to get what you need to see in Kg on the scales. So here I just push down (rotating the wheel to keep the wrench horizontal horizontal) until the scales show 40Kg (or about 90lb).

That's it! Feel free to tell me in the comments how this has saved you money, ruined your back, trashed your bike or that I've made critical mistakes in my reasoning..

Monday, January 13, 2025

Tube or Not Tube - Part 2a

One of my earliest posts on this blog (and one of the most popular, after at least one colleague read it once) was an explanation of why I hadn't yet set up my tyres tubeless. To summarise: more cost, more faff and few benefits. I had always intended to try it out though, and last month I finally found the time and energy to do so. This is intended to be the first of two posts, the second of which will cover more detailed ride impressions (if my knee ever gets better) and long-term maintenance effort. In this one we are talking about the installation process and first ride experience.

One of the things that put me off going tubeless was the endless supply of online articles explaining why you must go tubeless, how to do so, and all the problems that you will probably encounter in the process. Having run tubes in all my bikes for ever, and in my mountain bike for four years without any punctures, I was wary of taking out the tubes and taking a leap into the unknown. Many of the instructional articles make it sound like a lot of luck is required to get a tubeless setup working, and the thought of missing a ride due to a non-sealing tire when I am lucky to fit in one ride per week at the moment is not one I'm keen on.

So why now? Well, my bike was out of commission anyway due to user error and a long wait for a new rocker link, my tyres were getting a bit long in the tooth (or short in the knob?) and I discovered a box somewhere with some tubeless valves in. Perfect time for a tyre shuffle and tubeless experiment, safe in the knowledge that I had plenty of time to swap back again if it didn't go smoothly.

The front wheel was first, with a brand new shiny Specialized Hillbilly tyre to be installed on my Veltec ETR Extradrei wheel. I'd already installed tubeless tape and it looked in good condition, so nothing to do there. The plan was to try to get the tyre seated without any sealant in, then inject sealant through the valve stem. Amazingly the process was incredibly smooth and easy. The tyre didn't even pop into place, just sort of slid in without any noise using just my normal track pump. I then let the air out and added sealant, gave it a thorough slosh around, pumped up to 20psi and left it alone, expecting it to be flat in half an hour's time.

And that was it. Apart from the slightly unnerving feeling that I'd build something with a critical part missing, everything was totally fine. Buoyed by my success I decided to do the rear wheel as well the next day.

The rear wheel did not go as smoothly. Pumping frantically got me to around 30psi at which point the tyre bead was clearly not in the right place and air was coming out as fast as it was going in. Having a second go didn't help, although some careful listening suggested that a lot of the escaping air was coming from the valve region. Plan B was to add some sealant, resume frantic pumping and try to slosh the sealant around near the valve in the hope it would stem the leak. It took a few tries, but this process did work in the end. The sealant did its job at the valve hole and I was able to get the pressure high enough to get the tyre (Magic Mary in super trail casing) to seat correctly. A few more rounds of sloshing and repumping and it was holding enough air that I was happy to take it for a ride.

Initial ride impressions are pretty good. I've been out twice on it since and I'm pretty sure I can feel a difference riding over small roots and the like, and the sensation that I have a bit more grip in bumpy corners. The wheels definitely do lose enough air between rides to need pumping up every time, but since I used to check my pressures every ride anyway this isn't a huge additional effort. I grudgingly admit that I probably should have done this sooner, and it wasn't as bad as all the helpful online tutorials made it sound. Come back in 6 months or so to see if anything happened in the meantime to make me change my mind again.

Wednesday, January 20, 2021

You don't know what you haven't got until it's there

There aren't many pluses to being stuck inside in winter too injured to go riding, but at least it's given me some time to do other things, like sleeping too much, watching too much youtube, eating too much unhealthy food, etc. etc. I've also been making an effort to get my bike running smoothly so that when I am fit to ride I can just go without worrying about that.

Regular readers will know that I got pretty frustrated with the stock drivetrain on the 2019 Marin San Quentin 1 - mainly because of it's annoying habit of dropping the chain just as I was definitely about to beat a Strava record. I finally bit the bullet over Christmas and splurged for a shiny new Shimano 11spd setup with a (gasp) 42 tooth big cog on the back. Given that I'd been running a 32 / 36 ratio as my lowest gear for the last year without any real problems going straight to fifty-something teeth seemed a bit overkill. 

I like to do all the work on my bikes as much as possible, but the installation process highlighted once again how important a good local bike shop is. Despite having the right tools, googling for all the answers, heating it with a hair dryer, whacking it with a hammer, trying every possible alignment of tools including trying to balance standing up on each end of the cassette tool / chain whip combo (don't do this, it is stupid and dangerous and doesn't work. At least wear a helmet if you do) I could not get the old cassette locknut to shift. Five minutes and €4.50 later it was off thanks to a nice big bench-mounted vice in my local shop.

Anyway, back to the point of this post, which is that I found out about a tool I never knew existed, namely the Derailleur Hanger Alignment Tool. The way I found out was, of course, that I installed everything, adjusted limit screws and indexing and it still made a load of noises in first gear. I already had a suspicion that I'd bent the hanger before starting on the job, but thought that one simply bought a new hanger and that was the end of it. However, it turned out to be tricky to get hold of the right hanger, and even if I did it's best practice to check alighnment anyway, and I love bike tools, so I ended up with a shiny new toy.

New tools!

The tool was sold as a "Radon", but it was completely unbranded and looks remarkably similar to the SuperB TB-1946 which is available under a few different names. It was the cheapest I could find in stock anywhere but seems decent enough, and the small amount of play at the pivot doesn't seem to matter in practice. My only concern is how robust the gauge rod and clamp (middle of picture) are, but moderately careful handling should make that a non-issue.

Long story short (well, shorter anyway, I seem to have rambled quite a bit already) - the tool revealed that my hanger was, as suspected, bent, and quite a lot. The straightenening process was pretty straightforward (fnar fnar) and fixed everything so all 11 of the gears now run beautifully. As for cost effectiveness, I hope this one will be OK. I've bent the hanger on every mountain bike I've ever owned (yes, all two of them). As a kid I happily ran with only 12 of my theoretical 21 gears working (the front mech wouldn't go into the small cog and you couldn't get at the limit screws without unscrewing it from the bike, and I just couldn't be bothered) for a couple of years, but I'm a bit pickier now. I also get the feeling that modern drivetrains are a bit fussier about alignment. Hopefully it will be just as useful as the bottom bracket puller I bought in 1998 and used to remove my old cranks about 15 times last year.

Tuesday, December 1, 2020

Tu-be or not tu-be

Coming back to mountain biking after nearly 20 years off meant I had to get up to speed with a few changes. First was the sheer number of types of bike available! Once you've been riding, reading and learning about it for a few months it's not so bad, but wanting to buy a brand new bike with no run-up was pretty overwhelming. Of course nobody agrees on what sort of bike you should get, and working it out from your riding style or local terrain is tricky when you really don't know what either of those things are yet.

Tyre pressures have also become much more important than they once were. Knowing your "ideal" type pressure, and checking it every ride is now essential. There are plenty of online sources that will tell you how to find a good starting point from which to experiment, and the right experiments to run from that point.

This trail is great fun and easy to ride as long as you don't look down

Coupled to that is the introduction of tubeless tyres, and at least here almost everyone seems to be in agreement: tubeless good, tubes bad. So being the curmudgeon I am I naturally decided to run tubes until I found them unbearable. Why? Well, tubeless costs money to set up (tape, sealant, valves, new pump), money to maintain (new sealant every now and then), requires maintenance and seems to in some cases be pretty awkward to get to work. You still have to carry a tube with you in case of tyre failure, and I don't like the idea of spraying sealant all over the woods either. Also most of the commonly mentioned advantages don't (yet?) apply to me. 

I've settled on 22psi in the front tyre and 24psi in the back which has given me more grip than I believed possible. I've been riding a tubed setup since February and am yet to have a puncture. Some of you are probably thinking that I need to ride faster, and I can only say that I'm trying - I'm a lot faster now than I was 6 months ago and still getting better. So although I probably will experiment with a tubeless setup in the future, for the moment I'm sticking with my tubes and I don't think they are holding me back.


Friday, November 27, 2020

Bleeding hell

I've always done as much of my own bike maintenance as I can and as a result have learned how to fix, build, repair or maintain most parts of a bike. I find it fun to work out how stuff works, and it's also useful to be able to fix your bike, or someone else's, when you're out riding. However, after a kid came up to me with a separated brake hose last year and asked for help, I realised that I have a significant blind spot when it comes to hydraulic brakes. Having run cable rim brakes for my entire life until this year, I guess that is to be expected.

I've been slightly unhappy with the brakes on my MTB since I bought it and have tried a few things to improve them. "Bedding in" pads and discs was a new concept to me, so I did a quick internet search and gave it a go. Initially I just tried to bed in the rear brake, and it seemed to work. But after a couple of rides the front brake got better and better and eventually was much stronger than the rear. In hindsight I think I overdid the bedding in of the rear brake, and cooked the pads. Cleaning the rotors with disc brake cleaner helped a bit, and replacing the pads helped more, but the rear brake felt pretty spongy as well so I decided to try bleeding it.

Step one was to work out what tools and kit I needed to buy to do a successful bleed. There are so many different bleed kits available and not much official advice about exactly what you need. I have Tektro brakes, and I ended up with two of what Tektro call their basic bleed kit. Most people seem to agree that bleeding is much easier with two syringes, and the basic kit only comes with one. However buying two of them was still cheaper than any other two-syringe kit I could find and I was pretty sure that if it said Tektro on the box it was going to fit my brakes somehow.

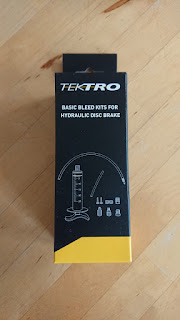
Official bleed kits!
 
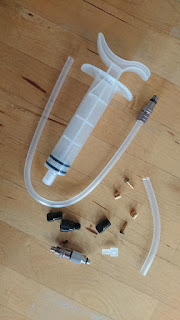
This is what you get in the box.

Next bit: mineral oil. The shop I found the bleed kits at didn't have any official Tektro mineral oil, or in fact any kind of mineral oil on display. After a bit of waiting around for helpful staff they came up with a bottle of Magura Royal Blood mineral oil, which I was assured would be fine. 

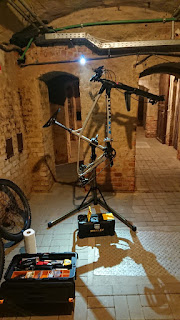
One last luxury purchase: my first ever bike stand. Now I really feel like an adult.

Time to start work. First off, how to get the bike into the stand? I settled on clamping on the seat tube as the top tube is a bit of a weird shape and didn't fit so snugly in the stand clamp. This worked fine, until I took the rear wheel out to start the bleed process. Then this happened:


Never mind. Removing the front wheel as well sorted the balance problems, and once the bike was angled ready to bleed (caliper at the bottom and lever at the top) it was all fine anyway. One thing I hadn't thought of was how to stop the bars flopping around. I didn't have anything the right size to wedge in or tie on anywhere, so settled on doing up the headset preload bolt way too tight to stop the bars moving. It was pretty dark in the cellar, but I had a bike light handy that fitted perfectly on a pipe on the wall. Now it was really time to start work.

One toolbox is never enough.

Step one - wheel out, brake pads out, push the pistons back with a tyre lever and put a bleed block in. Obviously there is no bleed block in the Tektro basic bleed kit. A small amount of swearing later and I managed to get a 10mm allen key to stay in there.

The main part of the process went reasonably smoothly. 

  • Rotate the lever so it is level, bleed port facing up. 
  • Remove the bleed port screw and make sure the rubber O-ring comes out with it. 
  • Screw in an empty syringe using the correct adapter to the lever bleed port. Pull slightly on the syringe so less oil comes out of the bleed port on the caliper when you undo it. 
  • Fill the second syringe 3/4 full with oil, make sure you get all the air out of the tube and attach to the caliper bleed port.

Then comes the fun bit. Squeezing the bottom syringe and pulling slightly on the top one starts to push fresh oil into the system. At this point, this is what I saw:


Pink Tektro brake fluid with giant air bubbles; surely this was the source of my spongy lever! Once I'd pushed most of the fluid through the top syringe looked like a bit like a raspberry and blueberry slushy:

Sorry for the terrible photo. It is quite hard to take a photo with a mobile when you have oily hands and have to hold one syringe up and it's quite dark.. As you can see, the new Magura oil is less dense and has floated to the top - weight weenies take note. I decided to ditch the oil in the top syringe, refill with new, blue oil and carry on. According to instructional videos from both Park Tools and Tektro, you should push the brake fluid up from the caliper first, then back down from the lever end, and then back up again, repeating until you don't get any bubbles. It all seemed too easy. I removed the syringes (caliper first), screwed the bleed screws back in, and tested the brake.

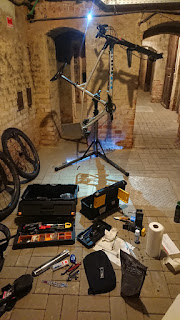
Maybe I need a third toolbox.

Spongy. Probably a bit worse than it was before. Damn. I compared it to the front brake lever which of course pulled straight back to the bar with no resistance as the front wheel was still out. Now my front brake pads were stuck together. Rage. I levered them apart with a tyre lever and cone spanner and decided to just reinstall the back wheel and see if it worked at all. First, brake pads back in. After three of four goes at this I dropped the whole lot on the floor, and the spring disappeared. Several minutes of hunting on the floor with a torch later I noticed it was still stuck in the caliper. After finally getting the rear brake back together and wheel inserted I gave the lever a few more squeezes just in case, and once again compared it to the front brake. Whoops. Still hadn't put the front wheel back in. More pad levering followed, and then front wheel reinstallation. At this point I was pretty fed up with the whole process, not to mention hungry, so I decided to give up and try again later. 

Here are my top tips for your first go at bleeding a brake:

  • It might not work - don't do it the day before a big ride.
  • Make a list of what you need before you go to the bike shop. Include a bleed block.
  • If you have a choice of long or short hoses, use the short ones.
  • Have somewhere to put small bits, like bleed screws and pads.
  • Have plenty of clean paper towels or similar.
  • Don't start if you're already in a bad mood.
  • Make sure you have lots of time. For a first time I needed around 90 minutes but I reckon it will go much quicker when I try again. 
  • Preferably have a cup of tea ready, unless you are miles away from a toilet.

If you're reading this and you know what I did wrong, please let me know! Otherwise I'll give it another try at some point and let you know how it goes.